Almost two years ago I published a post about how I read my Mobile Alerts temperature sensors via web interface using a Python script. This variant worked for me and still works without any problems. However, the other day I came across another option that I like much better because it is more reliable and independent of the cloud. With a proxy, which is switched between the gateway and the Internet, the data can be intercepted and processed further.
For this, there is the program “maserver“. It also makes the settings directly on the gateway. This then sends the data to an MQTT broker. For me it runs on a RaspberryPi with Ubuntu Server 22.04.
Preparations
On the server, nodejs and npm must first be installed:
sudo apt install nodejs npmAfter that you can download maserver:
git clone https://github.com/sarnau/MMMMobileAlerts.gitThe folder “MMMMobilealerts” now contains the maserver.
Configuration
In it you will find the file “config-example.json”. Rename this to “config.json”. The following configuration options are available:
- localIPv4Address: The IP address of the device on which the proxy is running. Required only if it has multiple IP addresses, for example, if it is connected via multiple network interfaces or Docker or a VPN server is running on it.
- mqtt: The address to the MQTT broker.
- mqtt_home: The topic in which the data should be published on the MQTT broker.
- mqtt_username, mqtt_password, logfile: self-explanatory.
- logGatewayInfo: Whether to display info about found gateways
- proxyServerPort: The port on which the proxy server should run.
- mobileAlertsCloudForward: Whether to send the data to the Mobilealerts Cloud.
- serverPost: The data can also be sent via POST.
- serverPostUser, serverPostPassword, locale: self-explanatory.
My configuration then looks like this:
{
  "localIPv4Address": "192.168.178.142",
  "mqtt": "mqtt://127.0.0.1",
  "mqtt_home": "MobileAlerts/",
  "mqtt_username": "",
  "mqtt_password": "",
  "publish_type": "default",
  "sonoffPublish_prefix": null,
  "logfile": "./MobileAlerts.log",
  "logGatewayInfo": true,
  "proxyServerPort": 8095,
  "mobileAlertsCloudForward": true,
  "serverPost": null,
  "serverPostUser": null,
  "serverPostPassword": null,
  "locale": "de-DE"
}
Installation
The proxy is installed with
npm installwhile being in the “maserver” directory.
Start
The program can be started with:
node mobilealerts.jsIt automatically finds the gateway in the network and configures itself in the gateway as a proxy. After at least 15 minutes, the first data should be visible.
Sending data to Homeassistant
In Homeassistant, we first add the MQTT integration under “Settings”->”Devices and Services”->”Add Integration”.
The configuration of the individual sensors is then done via the configuration.yaml file and looks like this, for example:
mqtt:
  sensor:
    - name: "Bad Temperatur"
      device_class: temperature
      state_topic: "MobileAlerts/XXXXXXXXXXXX/json"
      unit_of_measurement: "°C"
      value_template: "{{value_json.temperature[0]}}"
    - name: "Bad Luftfeuchtigkeit"
      device_class: humidity
      state_topic: "MobileAlerts/XXXXXXXXXXXX/json"
      unit_of_measurement: "%"
      value_template: "{{value_json.humidity[0]}}"
    - name: "Draußen Temperatur"
      device_class: temperature
      state_topic: "MobileAlerts/XXXXXXXXXXXX/json"
      unit_of_measurement: "°C"
      value_template: "{{value_json.temperature[0]}}"
    - name: "Draußen Luftfeuchtigkeit"
      device_class: humidity
      state_topic: "MobileAlerts/XXXXXXXXXXXX/json"
      unit_of_measurement: "%"
      value_template: "{{value_json.humidity[0]}}"

  # Batterien

  binary_sensor:
    - name: "MA Bad Batterie"
      device_class: battery
      state_topic: "MobileAlerts/XXXXXXXXXXXX/json"
      payload_on: "low"
      payload_off: "ok"
      value_template: "{{value_json.battery}}"
    - name: "MA Draußen Batterie"
      device_class: battery
      state_topic: "MobileAlerts/XXXXXXXXXXXX/json"
      payload_on: "low"
      payload_off: "ok"
      value_template: "{{value_json.battery}}"
Here, XXXXXXXXXX is the 12-digit device ID found in the Mobile Alerts app or directly on the back of the sensors.
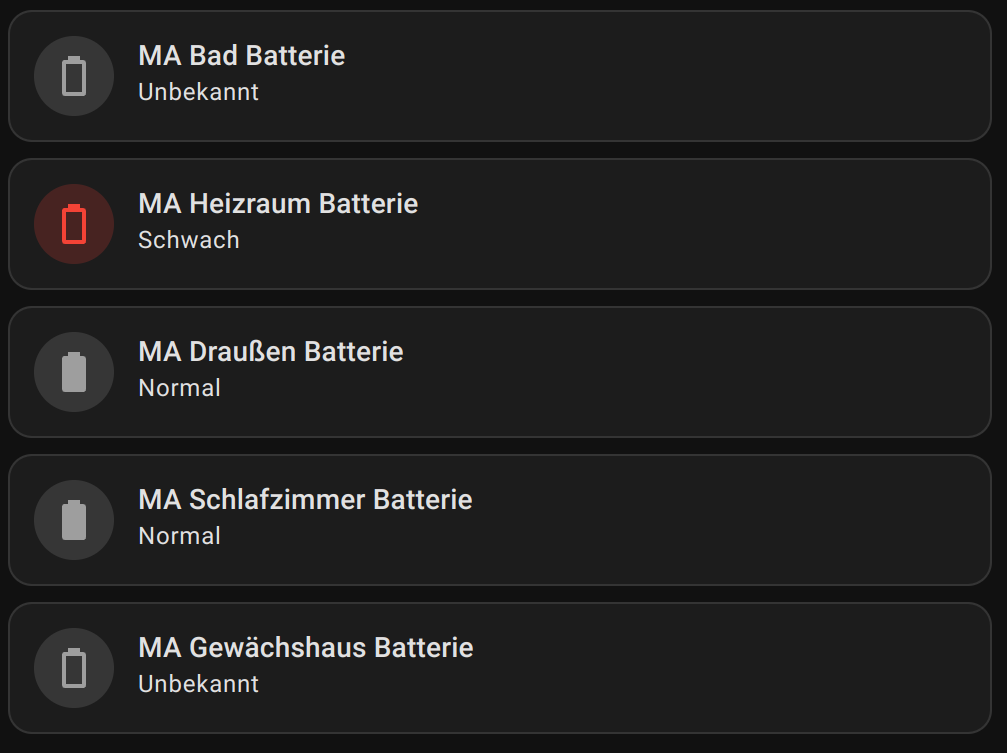
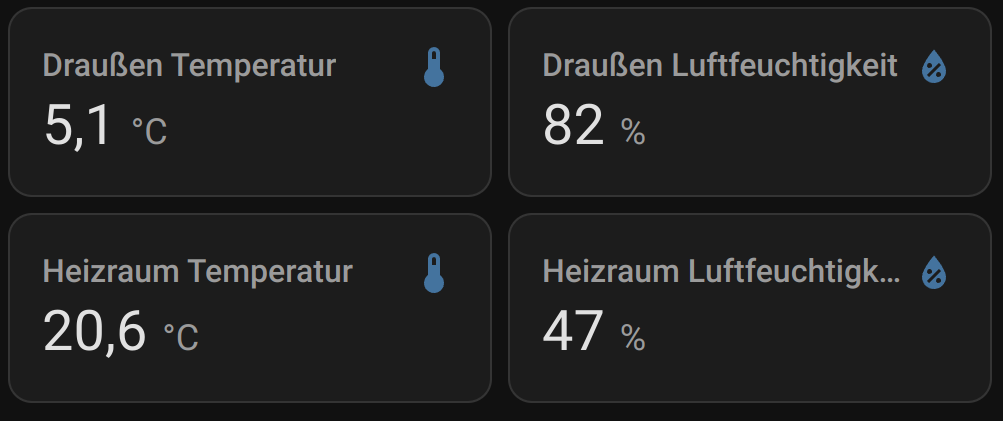
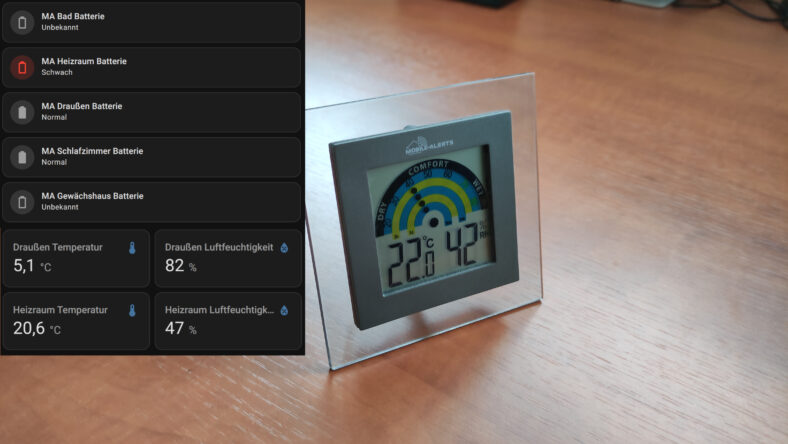
After a restart, the data should appear in Homeassistant:

Leave a Reply