
In this tutorial I will show you how to read out an SDM630 Modbus meter with a RaspberryPi (or any other Linux computer). The tutorial is intended more as a basis for your own project. There is plenty of ready-made software, such as Smartmeter.
Hardware
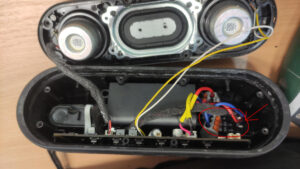
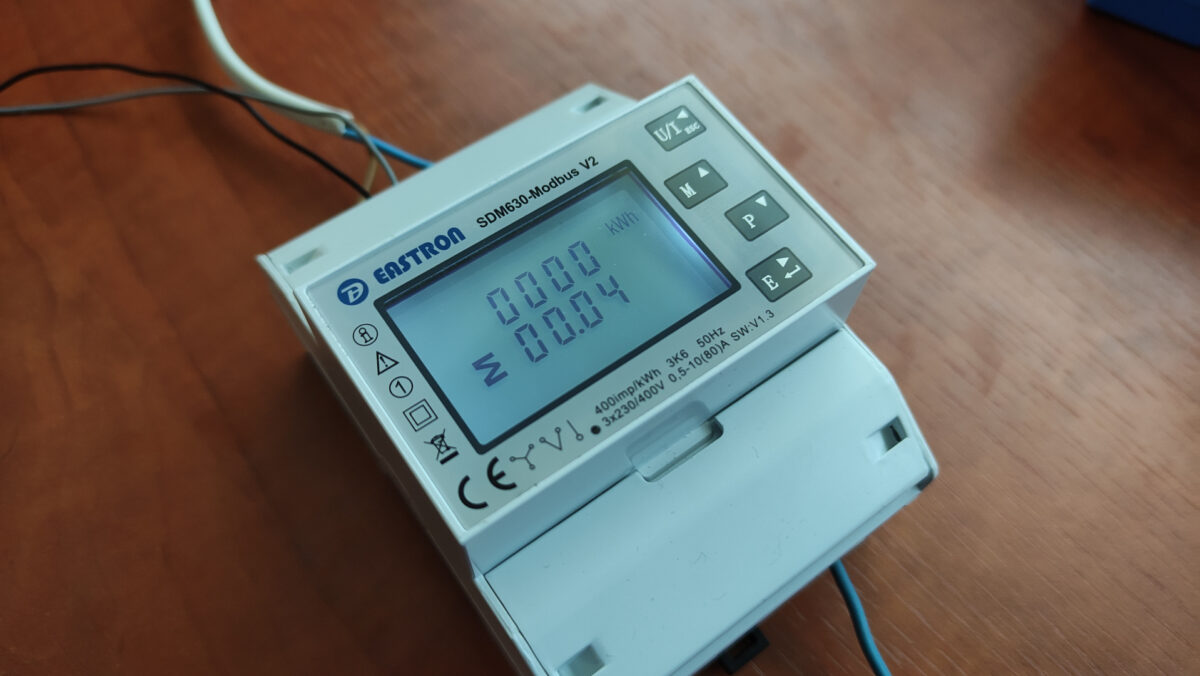
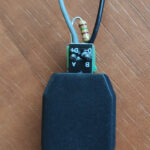
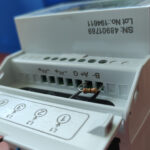
On the upper flap of the meter there are the terminals A+ and B-. These are connected to terminals A and B on the adapter. A terminating resistor of 150 Ohm is connected to the end of the bus or to the last and first device. Since I only have 2 devices, this is the meter and the USB adapter.
Theoretically, several meters can be connected to the bus in parallel.
Software
Configuration of the meter
Various settings must be made on the meter for the Modbus. This is how it works with my meter:
- Press and hold the E button
- Enter password (default: 1000)
- Press and hold the E button
- The message “Set Addr” appears
- Select the setting by pressing and holding the E button and change the address with the arrows. Exit the setting by pressing and holding the E button.
- Use the arrows to select the settings “Set baud”, “Set Pari” and “Set Stop” and set them as well.
The address is used to identify the device on the bus. If you have only one device, you can leave the address at 1, if you have several, give the devices different addresses.
The baud rate is simply the transmission speed. With a higher baud rate, however, only a shorter cable length is possible.
I do not use parity, so I use “none”
The stop bit can be left at 1
Read out values with script
In addition to the settings you made before, you need another value: the USB port. You can be quite successful here by trial and error. With ls /dev/ttyUSB* you can display all ports. In my case, there was only one.
This is my code:
|
1 2 3 4 5 6 7 8 9 10 11 12 13 14 15 16 17 18 19 20 21 22 23 24 25 26 27 28 29 30 31 32 33 34 35 36 37 38 39 40 41 42 43 44 45 46 47 48 49 50 51 52 53 54 55 56 57 58 59 60 61 62 63 64 65 66 67 68 69 70 71 72 73 74 75 76 77 78 79 80 81 82 83 84 85 86 87 88 89 90 91 92 93 94 95 96 97 98 99 100 101 102 103 104 105 106 107 108 109 110 111 112 113 114 115 116 117 118 119 120 121 122 123 124 125 126 127 128 129 130 131 132 133 134 135 136 137 138 139 140 141 142 143 144 145 146 147 148 149 150 151 152 153 154 155 156 157 158 159 160 161 162 163 164 165 166 167 168 169 170 171 172 173 174 175 176 177 178 179 |
import minimalmodbus instrument = minimalmodbus.Instrument('/dev/ttyUSB0', 1) # port name, slave address (in decimal) input_register = { "Spannung_L1": { "port": 0, "digits": 2, "Unit": "V", "use": True}, "Spannung_L2": { "port": 2, "digits": 2, "Unit": "V", "use": True}, "Spannung_L3": { "port": 4, "digits": 2, "Unit": "V", "use": True}, "Strom_L1": { "port": 6, "digits": 2, "Unit": "A", "use": True}, "Strom_L2": { "port": 8, "digits": 2, "Unit": "A", "use": True}, "Strom_L3": { "port": 10, "digits": 2, "Unit": "A", "use": True}, "Wirkleistung_L1": { "port": 12, "digits": 2, "Unit": "W", "use": True}, "Wirkleistung_L2": { "port": 14, "digits": 2, "Unit": "W", "use": True}, "Wirkleistung_L3": { "port": 16, "digits": 2, "Unit": "W", "use": True}, "Scheinleistung_L1": { "port": 18, "digits": 2, "Unit": "VA", "use": True}, "Scheinleistung_L2": { "port": 20, "digits": 2, "Unit": "VA", "use": True}, "Scheinleistung_L3": { "port": 22, "digits": 2, "Unit": "VA", "use": True}, "Blindleistung_L1": { "port": 24, "digits": 2, "Unit": "VAr", "use": True}, "Blindleistung_L2": { "port": 26, "digits": 2, "Unit": "VAr", "use": True}, "Blindleistung_L3": { "port": 28, "digits": 2, "Unit": "VAr", "use": True}, "Leistungsfaktor_L1": { "port": 30, "digits": 2, "Unit": "", "use": True}, "Leistungsfaktor_L2": { "port": 32, "digits": 2, "Unit": "", "use": True}, "Leistungsfaktor_L3": { "port": 34, "digits": 2, "Unit": "", "use": True}, "Phasenwinkel_L1": { "port": 36, "digits": 2, "Unit": "Grad", "use": True}, "Phasenwinkel_L2": { "port": 38, "digits": 2, "Unit": "Grad", "use": True}, "Phasenwinkel_L3": { "port": 40, "digits": 2, "Unit": "Grad", "use": True}, "Durchschnittliche_Spannung_zu_N": { "port": 42, "digits": 2, "Unit": "V", "use": True}, "Durchschnittlicher_Strom_zu_N": { "port": 46, "digits": 2, "Unit": "A", "use": True}, "aktueller_Gesamtstrom": { "port": 48, "digits": 2, "Unit": "A", "use": True}, "aktuelle_Gesamtwirkleistung": { "port": 52, "digits": 2, "Unit": "W", "use": True}, "aktuelle_Gesamtscheinleistung": { "port": 56, "digits": 2, "Unit": "VA", "use": True}, "aktuelle_Gesamtblindleistung": { "port": 60, "digits": 2, "Unit": "VAr", "use": True}, "aktueller_Gesamtleistungsfaktor": { "port": 62, "digits": 2, "Unit": "", "use": True}, "aktueller_Gesamtphasenwinkel": { "port": 66, "digits": 2, "Unit": "A", "use": True}, "Frequenz": { "port": 70, "digits": 2, "Unit": "Hz", "use": True}, "Import_Wh_seit_reset": { "port": 72, "digits": 2, "Unit": "kWh", "use": True}, "Export_Wh_seit_reset": { "port": 74, "digits": 2, "Unit": "kWH", "use": True}, "Import_VArh_seit_reset": { "port": 76, "digits": 2, "Unit": "kVArh", "use": True}, "Export_VArh_seit_reset": { "port": 78, "digits": 2, "Unit": "kVArh", "use": True}, "VAh_seit_reset": { "port": 80, "digits": 2, "Unit": "kVAh", "use": True}, "Ah_seit_reset": { "port": 82, "digits": 2, "Unit": "Ah", "use": True}, "Gesamtwirkleistung": { "port": 84, "digits": 2, "Unit": "W", "use": True}, "Max_Gesamtwirkleistung": { "port": 86, "digits": 2, "Unit": "W", "use": True}, "Gesamtscheinleistung": { "port": 100, "digits": 2, "Unit": "VA", "use": True}, "Max_Gesamtscheinleistung": { "port": 102, "digits": 2, "Unit": "VA", "use": True}, "Gesamtstrom_Neutralleiter": { "port": 104, "digits": 2, "Unit": "A", "use": True}, "Max_Strom_Neutralleiter": { "port": 106, "digits": 2, "Unit": "A", "use": True}, "Spannung_L1_L2": { "port": 200, "digits": 2, "Unit": "V", "use": True}, "Spannung_L2_L3": { "port": 202, "digits": 2, "Unit": "V", "use": True}, "Spannung_L3_L1": { "port": 204, "digits": 2, "Unit": "V", "use": True}, "Durchschnittsspannung_L_L": { "port": 206, "digits": 2, "Unit": "V", "use": True}, "Strom_Neutralleiter": { "port": 224, "digits": 2, "Unit": "A", "use": True}, "THD_Spannung_L1": { "port": 234, "digits": 2, "Unit": "%", "use": True}, "THD_Spannung_L2": { "port": 236, "digits": 2, "Unit": "%", "use": True}, "THD_Spannung_L3": { "port": 238, "digits": 2, "Unit": "%", "use": True}, "THD_Strom_L1": { "port": 240, "digits": 2, "Unit": "%", "use": True}, "THD_Strom_L2": { "port": 242, "digits": 2, "Unit": "%", "use": True}, "THD_Strom_L3": { "port": 244, "digits": 2, "Unit": "%", "use": True}, "THD_Durchschnittliche_Spannung_zu_N": { "port": 248, "digits": 2, "Unit": "%", "use": True}, "THD_Durchschnittlicher_Strom_zu_N": { "port": 250, "digits": 2, "Unit": "%", "use": True}, "Strom_L1_demand": { "port": 258, "digits": 2, "Unit": "A", "use": True}, "Strom_L2_demand": { "port": 260, "digits": 2, "Unit": "A", "use": True}, "Strom_L3_demand": { "port": 262, "digits": 2, "Unit": "A", "use": True}, "Max_Strom_L1_demand": { "port": 264, "digits": 2, "Unit": "A", "use": True}, "Max_Strom_L2_demand": { "port": 266, "digits": 2, "Unit": "A", "use": True}, "Max_Strom_L3_demand": { "port": 268, "digits": 2, "Unit": "A", "use": True}, "THD_Spannung_L1_L2": { "port": 334, "digits": 2, "Unit": "%", "use": True}, "THD_Spannung_L2_L3": { "port": 336, "digits": 2, "Unit": "%", "use": True}, "THD_Spannung_L3_L1": { "port": 338, "digits": 2, "Unit": "%", "use": True}, "THD_Durchschnittliche_Spannung_zu_L_L": { "port": 340, "digits": 2, "Unit": "%", "use": True}, "Total_kwh": { "port": 342, "digits": 2, "Unit": "kwh", "use": True}, "Total_kvarh": { "port": 344, "digits": 2, "Unit": "kvarh", "use": True}, "Import_L1_kwh": { "port": 346, "digits": 2, "Unit": "kwh", "use": True}, "Import_L2_kwh": { "port": 348, "digits": 2, "Unit": "kwh", "use": True}, "Import_L3_kwh": { "port": 350, "digits": 2, "Unit": "kwh", "use": True}, "Export_L1_kwh": { "port": 352, "digits": 2, "Unit": "kwh", "use": True}, "Export_L2_kwh": { "port": 354, "digits": 2, "Unit": "kwh", "use": True}, "Export_L3_kwh": { "port": 356, "digits": 2, "Unit": "kwh", "use": True}, "Gesamtstrom_L1_kwh": { "port": 358, "digits": 2, "Unit": "kwh", "use": True}, "Gesamtstrom_L2_kwh": { "port": 360, "digits": 2, "Unit": "kwh", "use": True}, "Gesamtstrom_L3_kwh": { "port": 362, "digits": 2, "Unit": "kwh", "use": True}, "Import_L1_kvarh": { "port": 364, "digits": 2, "Unit": "kvarh", "use": True}, "Import_L2_kvarh": { "port": 366, "digits": 2, "Unit": "kvarh", "use": True}, "Import_L3_kvarh": { "port": 368, "digits": 2, "Unit": "kvarh", "use": True}, "Export_L1_kvarh": { "port": 370, "digits": 2, "Unit": "kvarh", "use": True}, "Export_L2_kvarh": { "port": 372, "digits": 2, "Unit": "kvarh", "use": True}, "Export_L3_kvarh": { "port": 374, "digits": 2, "Unit": "kvarh", "use": True}, "Total_L1_kvarh": { "port": 376, "digits": 2, "Unit": "kvarh", "use": True}, "Total_L2_kvarh": { "port": 378, "digits": 2, "Unit": "kvarh", "use": True}, "Total_L3_kvarh": { "port": 380, "digits": 2, "Unit": "kvarh", "use": True}, } for key in input_register: if input_register[key]["use"] == True: print(key + ": " + str(round(instrument.read_float(functioncode=4, registeraddress=input_register[key]["port"], number_of_registers=input_register[key]["digits"]), 2)) + input_register[key]["Unit"]) |
In line 1, the Modbus module is imported from Python. You may need to install this:
$ pip3 install minimalmodbusIn the next line, the device is initialised. Here you may have to change the USB port and the Modbus address. After that, there is a very long part, through which the script later knows which value has which number and which unit. The “use” can be used to determine whether the value is to be used or not. To do this, simply set the value to True or False. Line 177 contains a for loop that is executed once for each value. Line 178 checks whether the value should be used. Everything after that (don’t forget the indentations) can now be programmed freely. In my example, all the data is simply printed. The line
|
1 |
instrument.read_float(functioncode=4, registeraddress=input_register[key]["port"], number_of_registers=input_register[key]["digits"]) |
returns the value (the one at which the for loop is currently). With
|
1 |
input_register[key]["Unit"] |
you get the unit.
For example, this code example writes the data to an Influx database.
Now have fun programming!
Leave a Reply